Thursday, 15 February 2024

Small Update, Bigger Teeth?

Warboss and his bodyguard.

I've been working on a large unit of black orcs this last month, and while working on them I also worked on a Night Goblin Warboss on Giant Squig. I've had this model for ages, and never used it in a single game of Warhammer, but that will soon change.

Snotling buddy.

I painted him exactly the same way as the Squig Hoppers before him, but he comes with some extras, like a shield and sword, and he has armoured greaves and boots too. This Warboss is quite well off, and in the Old World, he'll be sporting light armour and a shield along with some Troll Trousers, to give him a 3+ armour save and 5+ regeneration save. If points persist, he might even be sporting a magical weapon, but otherwise he'll be used primarily to hunt down smaller units and add some punch where needed.

Powerful legs.

His random movement will make it a gamble to use him, but with that come some trade offs, primarily being that enemies wont be able to make a charge reaction to him. At 3D6 movement, he will on average move around at 11 inches, and if lucky, can be very annoying. His skirmishing ability means he'll be far less restricted than other monstrous mounts, able to move around 360 degree around.

Knightly Goblin.

His only real downside, other than the unreliable movement, is his poor leadership. At leadership 6, he wont be passing any failed break tests if he ever needs to take them. Luckily he isn't that pricey, with him at 55 points, along with 5 points for light armour and shield, and the giant squig 25 points. 85 point melee lord on a mount is quite good. Adding the Troll Trousers for a +1 armour and 5+ regen save for 40 points makes him that much more survivable.

Charge!

I can't wait to try him in The Old World, Orcs and Goblins seem to be in a good place for this edition, and am working away at my unit of Black Orcs. They will be a large unit of 24, with 20 of them already coming along very nicely. Four more Black Orc models are in the post, 3 with great weapons, and one named character which will act as the unit champion in this edition.

Zagrot will be his name!

Until next time!

Monday, 8 January 2024

A Horde of Teeth!


Finally finished!

In this update, I'm going to show off my completed horde of Night Goblin Squigs I used to use back in eighth edition Warhammer, but now can use in Warhammer Armies Project and in the future The Old World Warhammer. Along with the horde, there are two units of Night Goblin Squig Hoppers as well, ready to pounce on some unlucky chaff or some out of the way war machine.

Mad Lunatics.

All these models are metal, and they all were bought off eBay a long time ago, second hand. As such some of the bases they came with aren't original, and are instead weird magnetic bases used by the previous owner. This caused quite some problems since these bases were slightly larger than the normal bases, and when ranked up, they wouldn't fit onto a movement tray, especially at such a large amount. Thus it was required to cut up some of these magnetic bases, making them look worse for it. Thankfully in a horde like this, they really don't stand out.


Some Bases are weird. Can you tell?

There are thirty-two Squigs, with a single 40x40 base with two squigs on it counting as four, kind of a small unit filler. There are six different varieties of squig models, which means there are multiples of each model. If you pay close attention, you can see six of the tongue squigs along. The red on them is simply Army Painter Spray Dragon Red, and then dry brushed Pure Red, followed by Lava Orange. Quite easy and effective, and for many years afterwards, they remained like that.

Madder Lunatics?

It wasn't until recently, where I began using them in units of twenty in Warhammer Armies Project, that I decided to finish painting them, alongside some trolls in a previous post. This time I finished the entirety of the unit from years ago that I started, and I'm quite pleased with how well they look. I even ended up buying one more hopper to round out the ten that I now have.

Variety of handlers.

More Handlers.

Handlers and unit filler.

The handlers were easy enough to paint, much like the usual Night Goblins, but they have a variety of weapons to break them up in terms of colours needed. Some have cymbals, others have tridents or spears. One variety even has bagpipes, looking like they are in lock step while making as much racket as a little goblin can.

Twenty model configuration.

Another twenty models.

In eighth edition Warhammer, I used them as a large horde of squigs, with it primarily holding the centre of my force, a literal wall of teeth. But in Armies Project, I split them down into two blocks of twenty, using them more like hit squads, dealing what damage they could before they exploded when they failed a break test. I was happy enough with their performance that I had to complete them finally. Looking forward, The Old World has these guys at 10 points per squig, and 3 points per handler. They essentially work the same way as in previous editions, but I'm not convinced they will be any good. Will have to wait and see when the rules finally release, but I expect they wont be as good as in eighth edition.

Two Units of Twenty.

Ten Hoppers and Extras.

With these complete, I'm already working on my next project for my Orcs and Goblins. Some Black Orcs!

Sunday, 17 December 2023

Double Update! Stinky Trolls and Unruly Squigs!


Unleash the beasts of war!

Today I managed to knock off some trolls that have been sitting on my painting table for far too long, and with them some squigs were also finished off. Both these set of miniatures have been semi painted, never being finished simply due to laziness. But no more! Well, at least the River Trolls, there are still plenty of squigs to go.

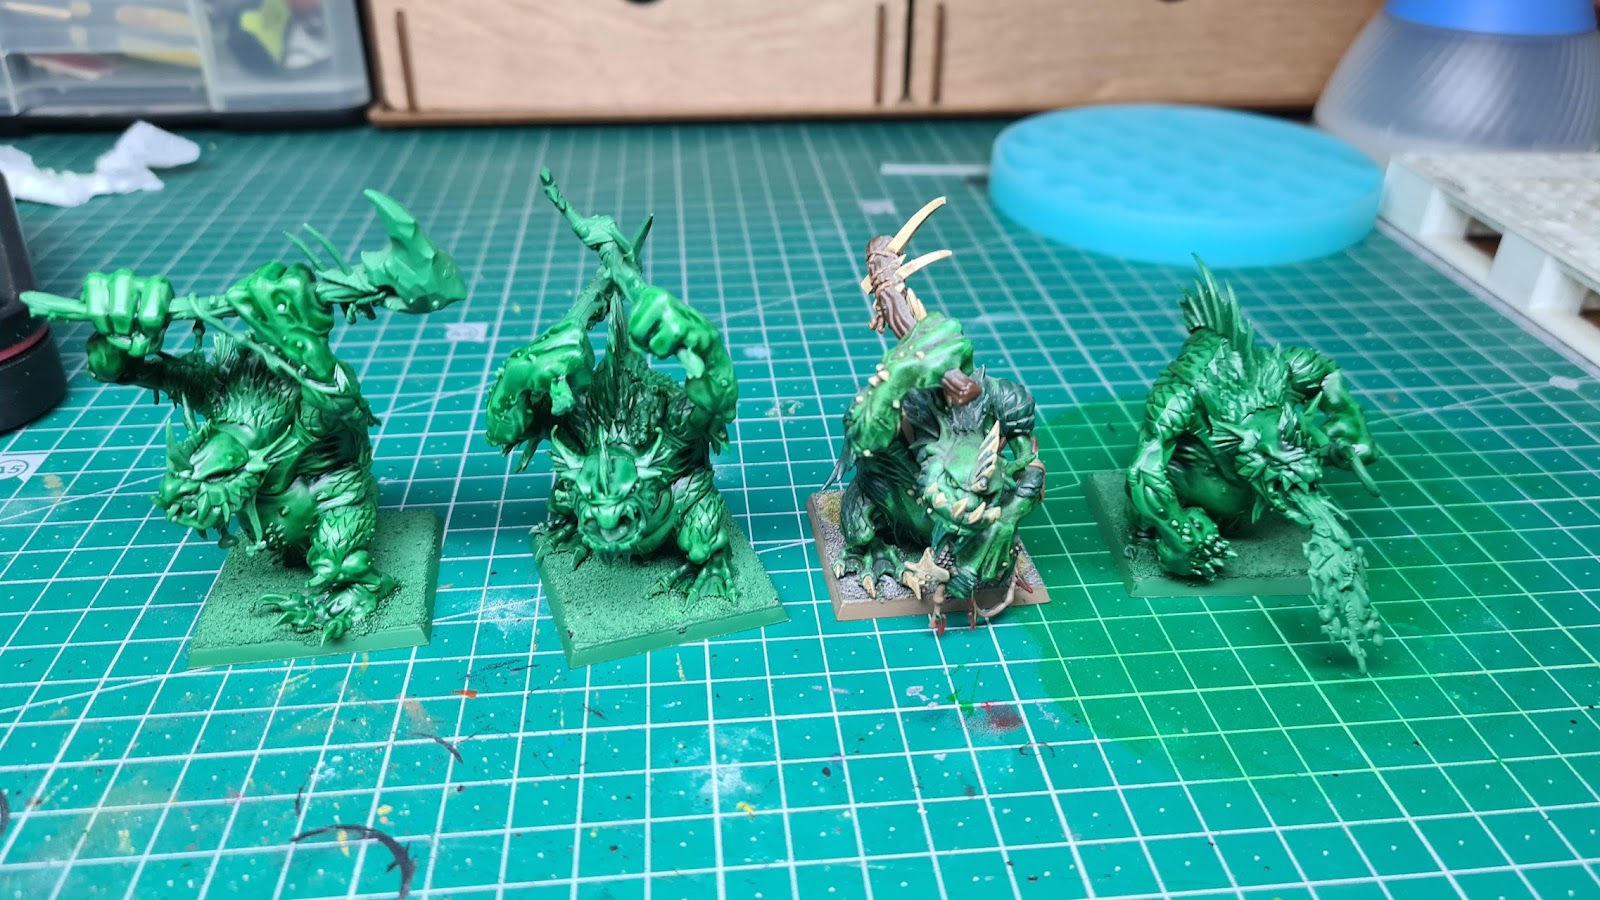
Some were complete, others not.

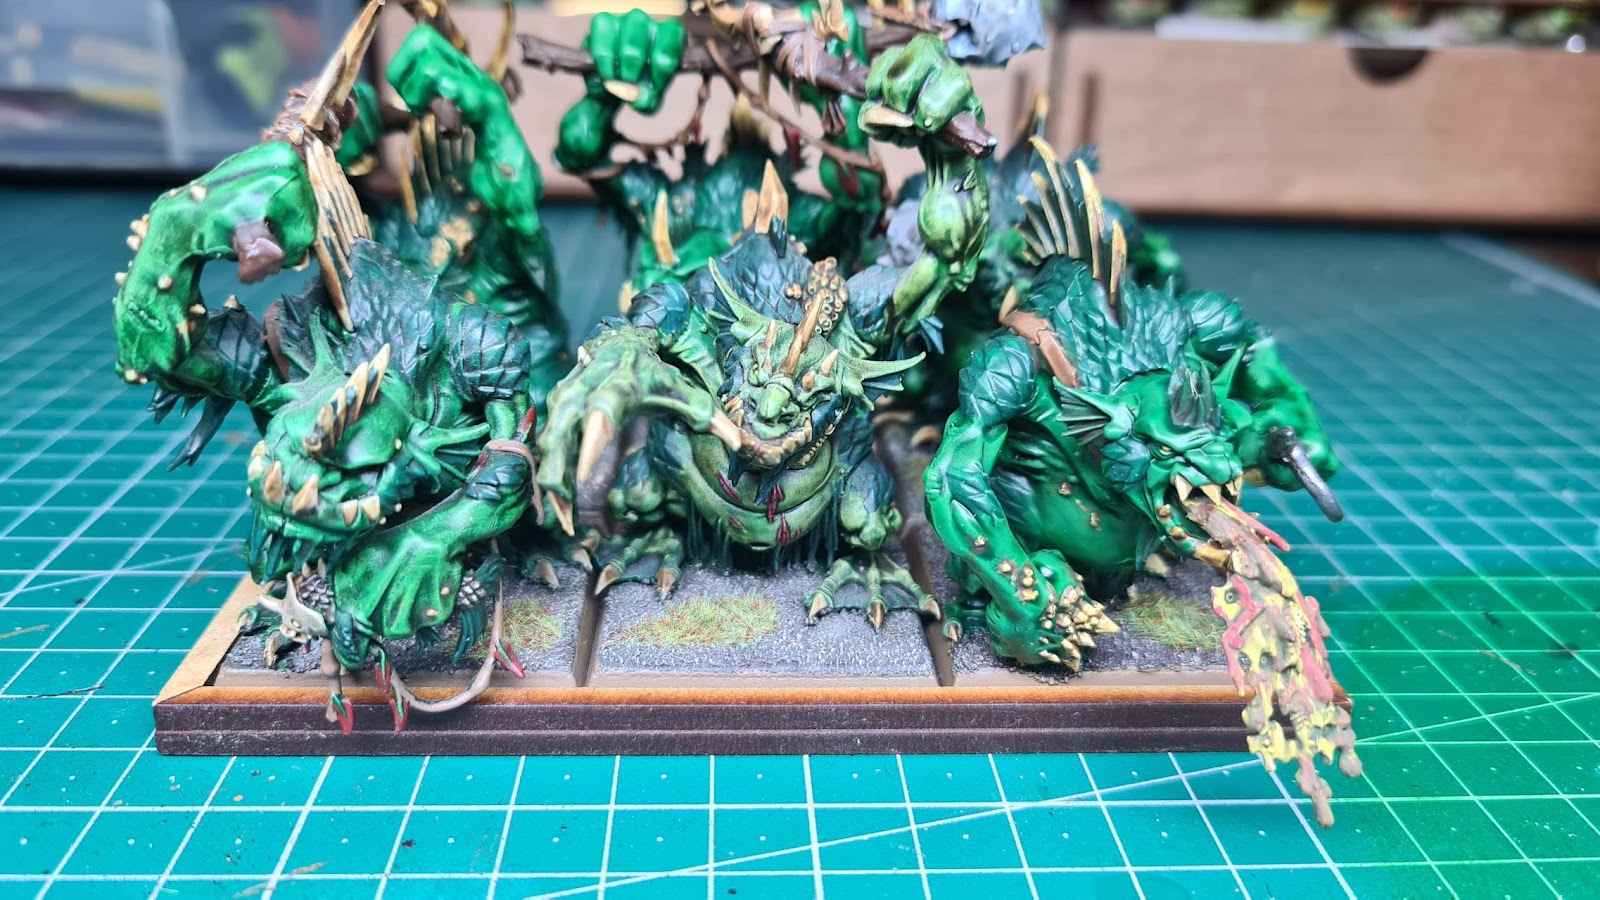
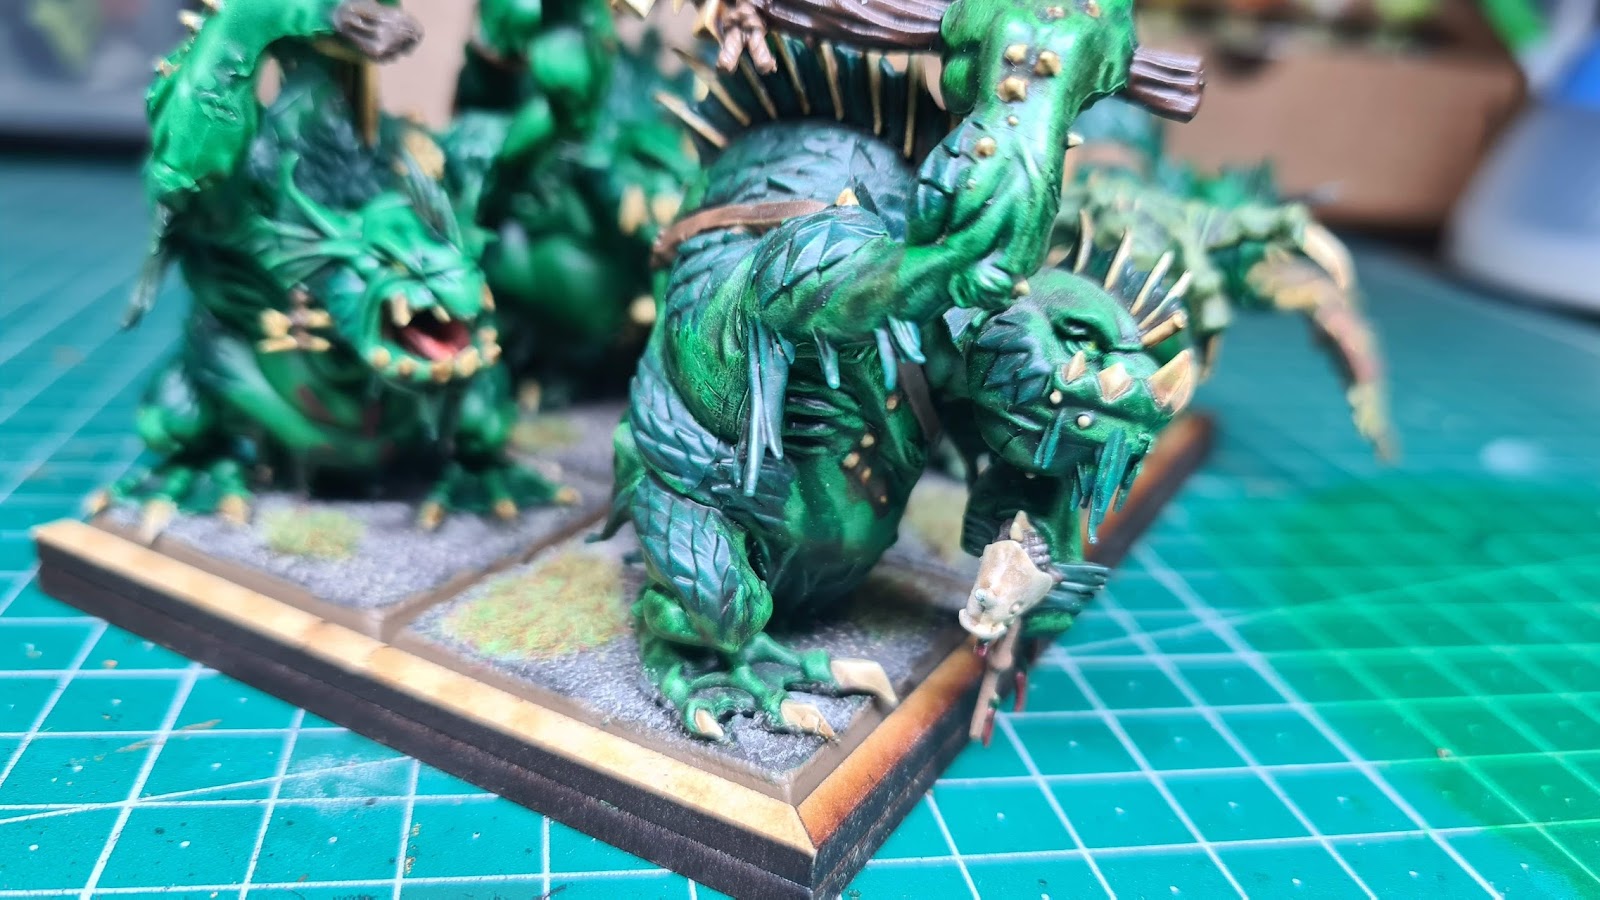
I started with the River Trolls, trying to match the scheme and techniques from the previous three. The first original troll was painted with a different green, and so he looks lighter than the rest. He will simply act as a leader model for the troop. The trolls are quite easy to paint, with two different greens as the base colours for it, Army Painter Greenskin, which was applied by spray can, then Army Painter Dark Angels Green for the scales.

The original lighter troll. He's the leader.

I took out my collection of Army Painter paint bottles, and begun replicating the original scheme, which worked out quite easily, with the weapons painted Monster Brown and the straps painted Leather Brown. The teeth, spikes, and claws were undercoated brown, and then painted Skeleton Bone. The barnacles on some of the troll, and some pimples, were also painted Skeleton Bone, and were all washed Light Tone.

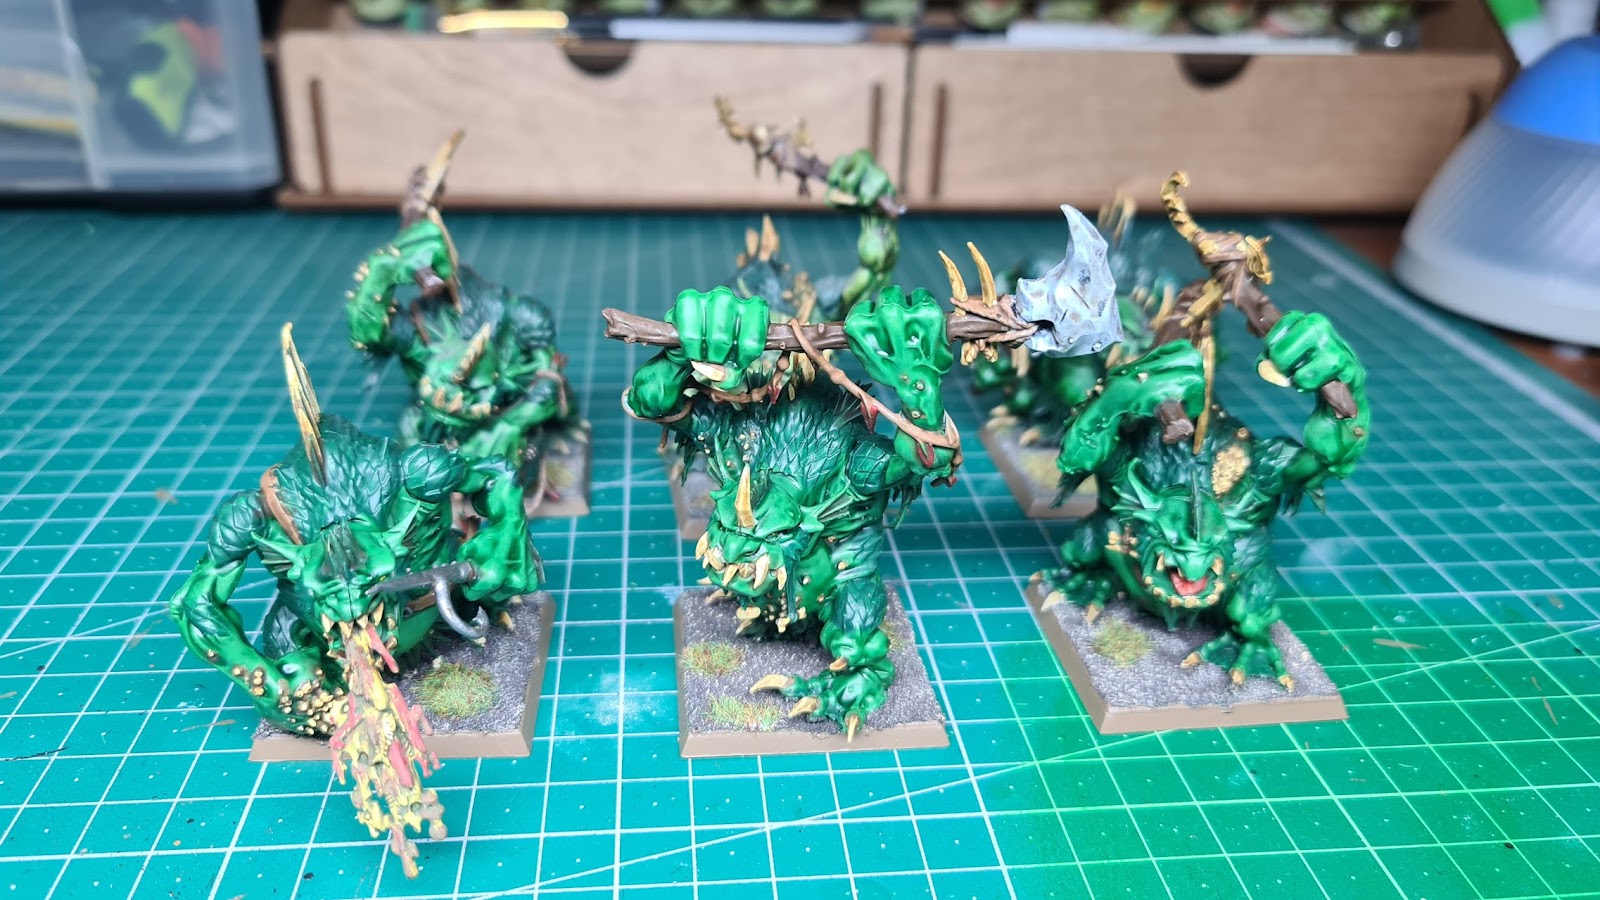
Three new trolls join the troop.

The troll vomit is a mix of colour already on the pallet, washed with a contrast paint of greenish yellow and Light Tone. The stone axe head is Uniform Grey with a diluted Light Tone. The bases are my traditional recipe of Citadel Dryad Bark dry brushed Dry Eldar Flesh, with Steel Legion Drab on the rim, topped off with some Citadel Grass.

Vomiting on hopefully some knights.

Smashing time!

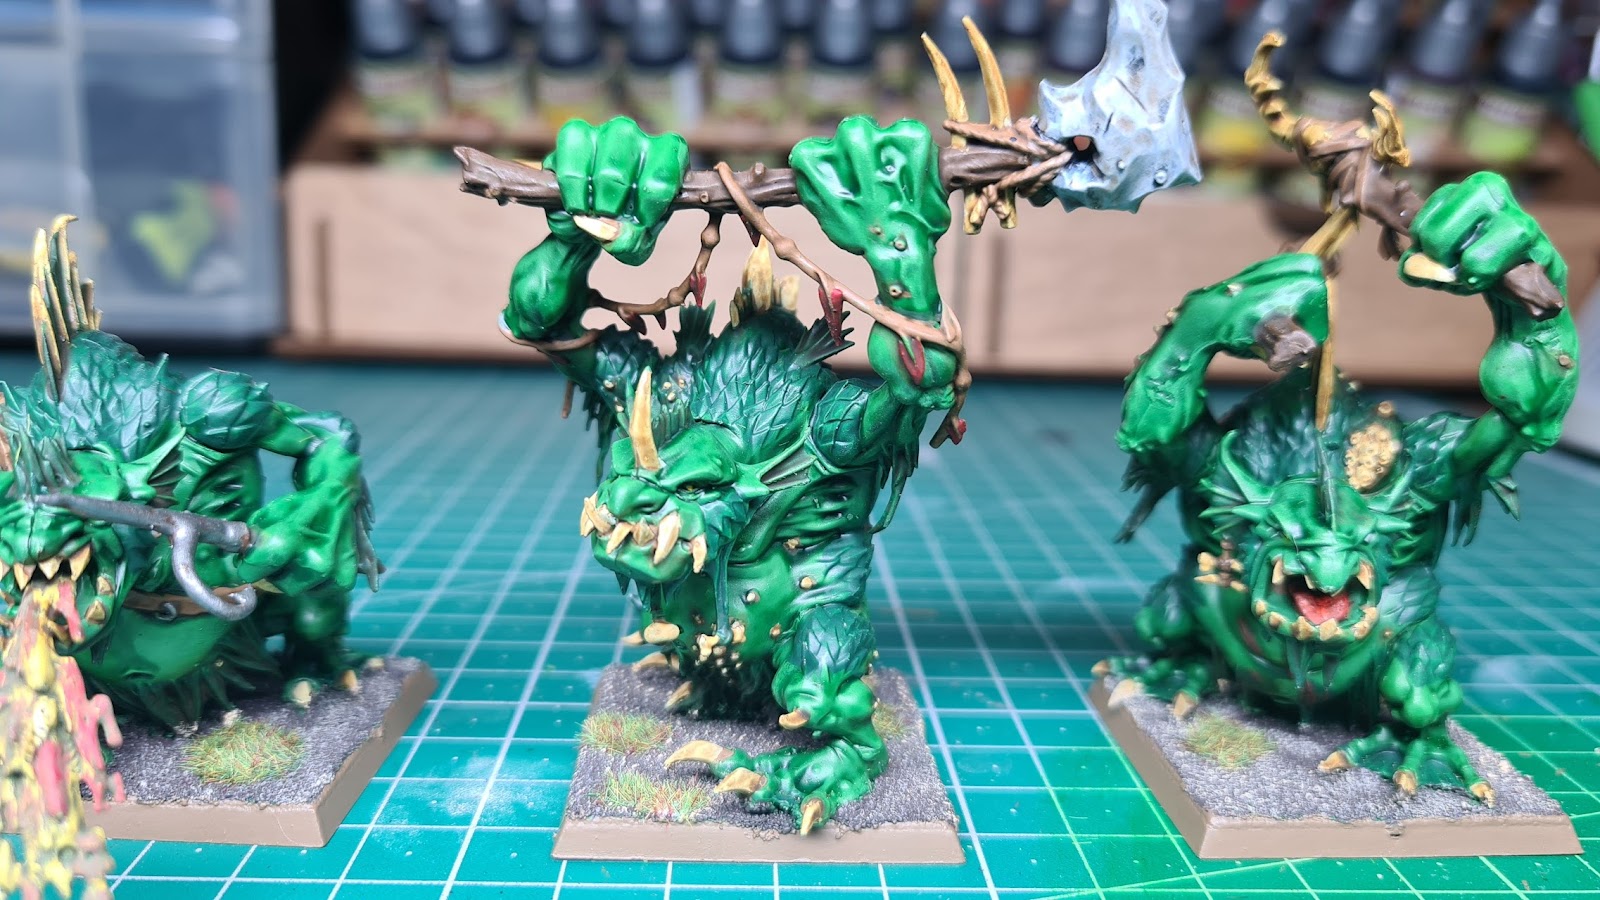
"I go' da biggest wan!"

Troll booty Bilbo and Gandalf would rather not find.

With these guys complete, now I'll be more inclined to run them as a group of six, with my recent games I've been running them as single models for disruption. A big group of six would be good to attack with, as their unit size is small for quite a lot of attacks, great speed and regeneration to mitigate serious damage. Their downside is stupidity, having to test every turn on low leadership without a general nearby, and at 45 points per model, they can be quite expensive. I'm going to try using them defensively, holding the line and protecting artillery.

They look menacing in their movement tray.

Mean and green! Stinky too!

Hot acid or a giant fish hook?

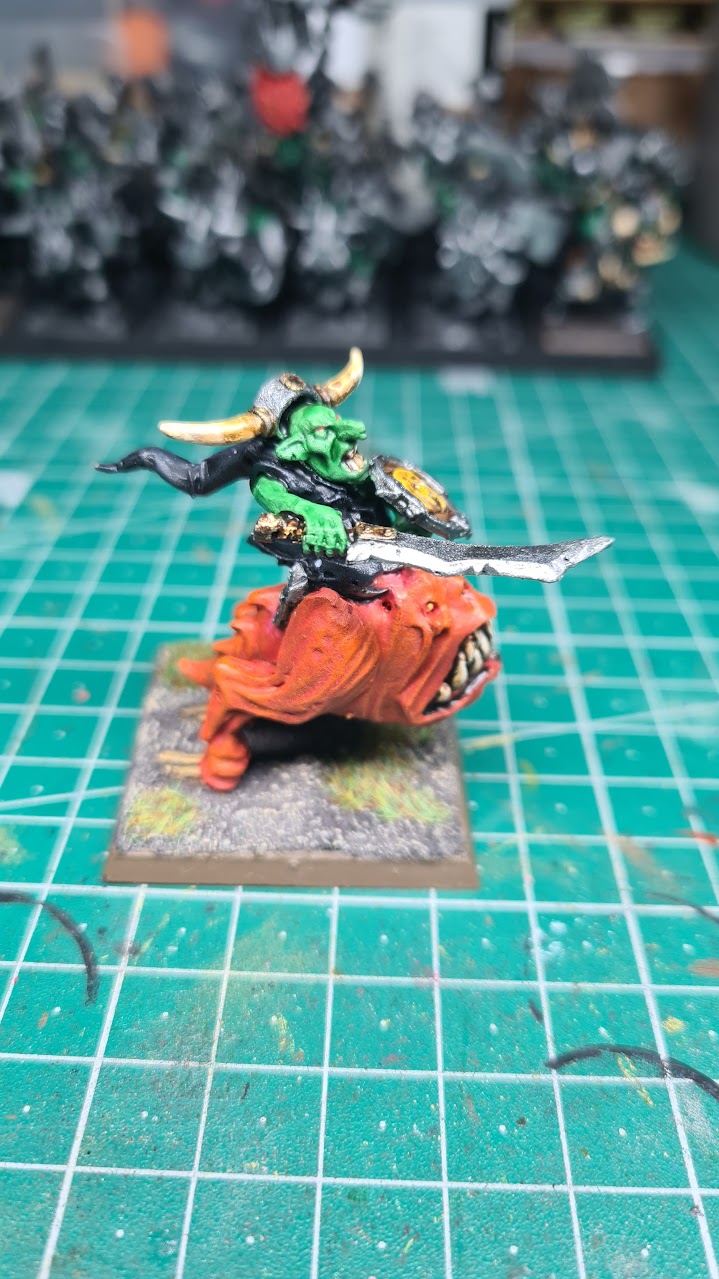
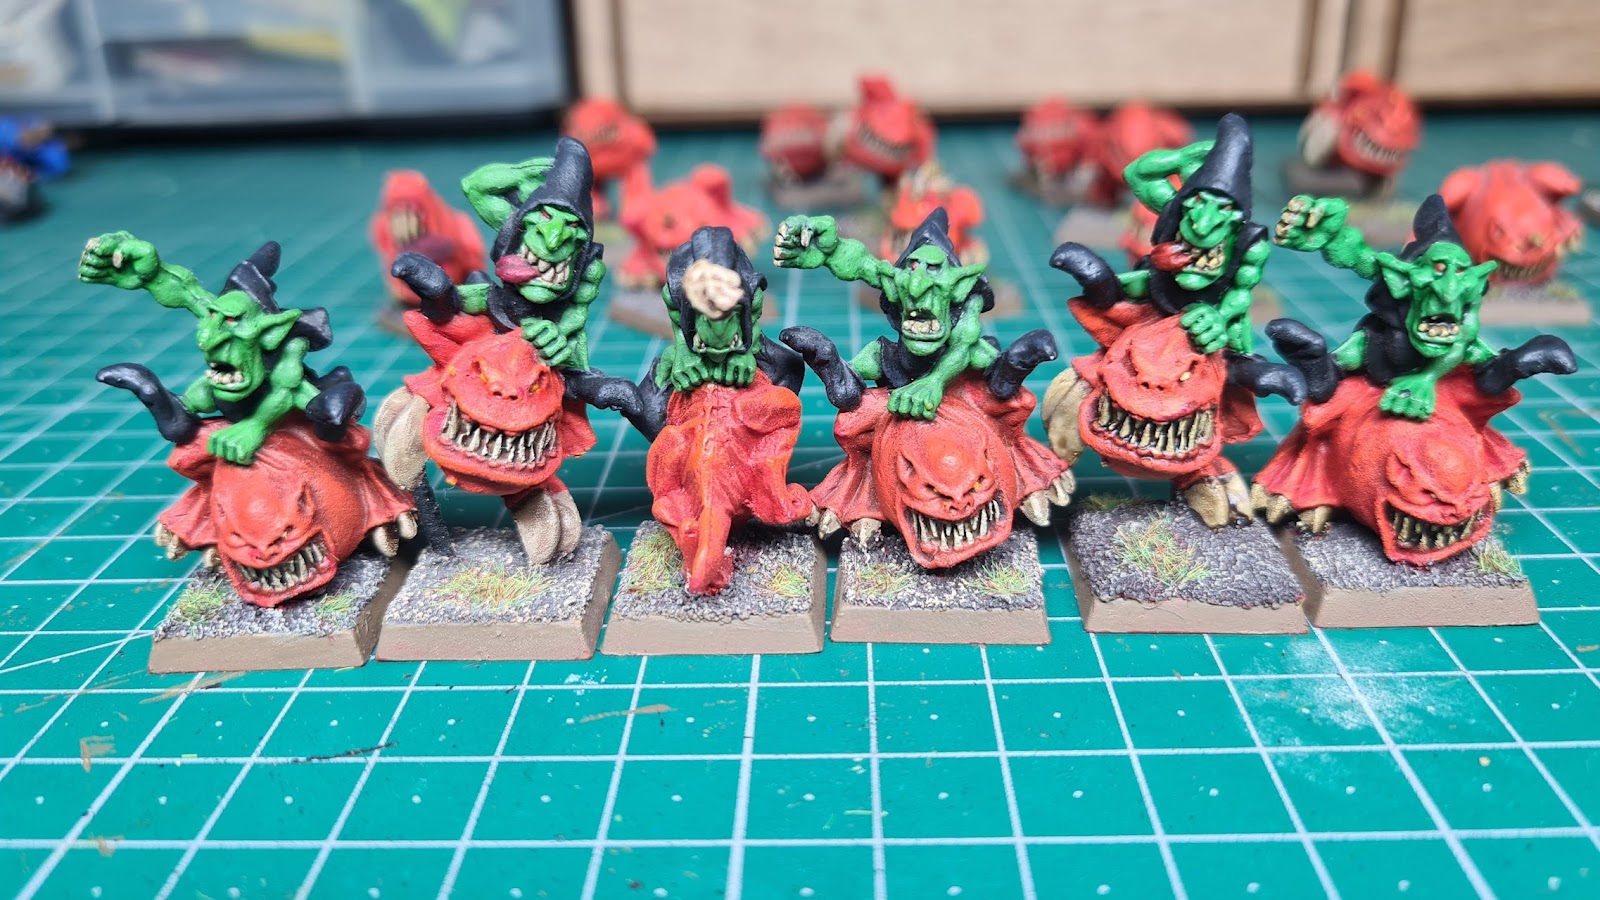
Loony Night Goblins on Squigs!

The Squigs are also another unit that had a few completed models, but many many more which were half complete. There are still more that are incomplete, but at least there are now some more which join the ranks of the painted.

Three Brothers.

Twins with one Goblin riding backwards!

I started on the Squig Hoppers, which I have yet to use in a single game of Warhammer, at least I cannot remember ever using them. They are fun looking models, but writing this right now, I realise that I only have three different models with repeat models in my collection. I'm going to have to look into getting some other sculpts for a bit more variety.

Is he riding backwards or hopping backwards?

Yes, they are all hopping the same way.

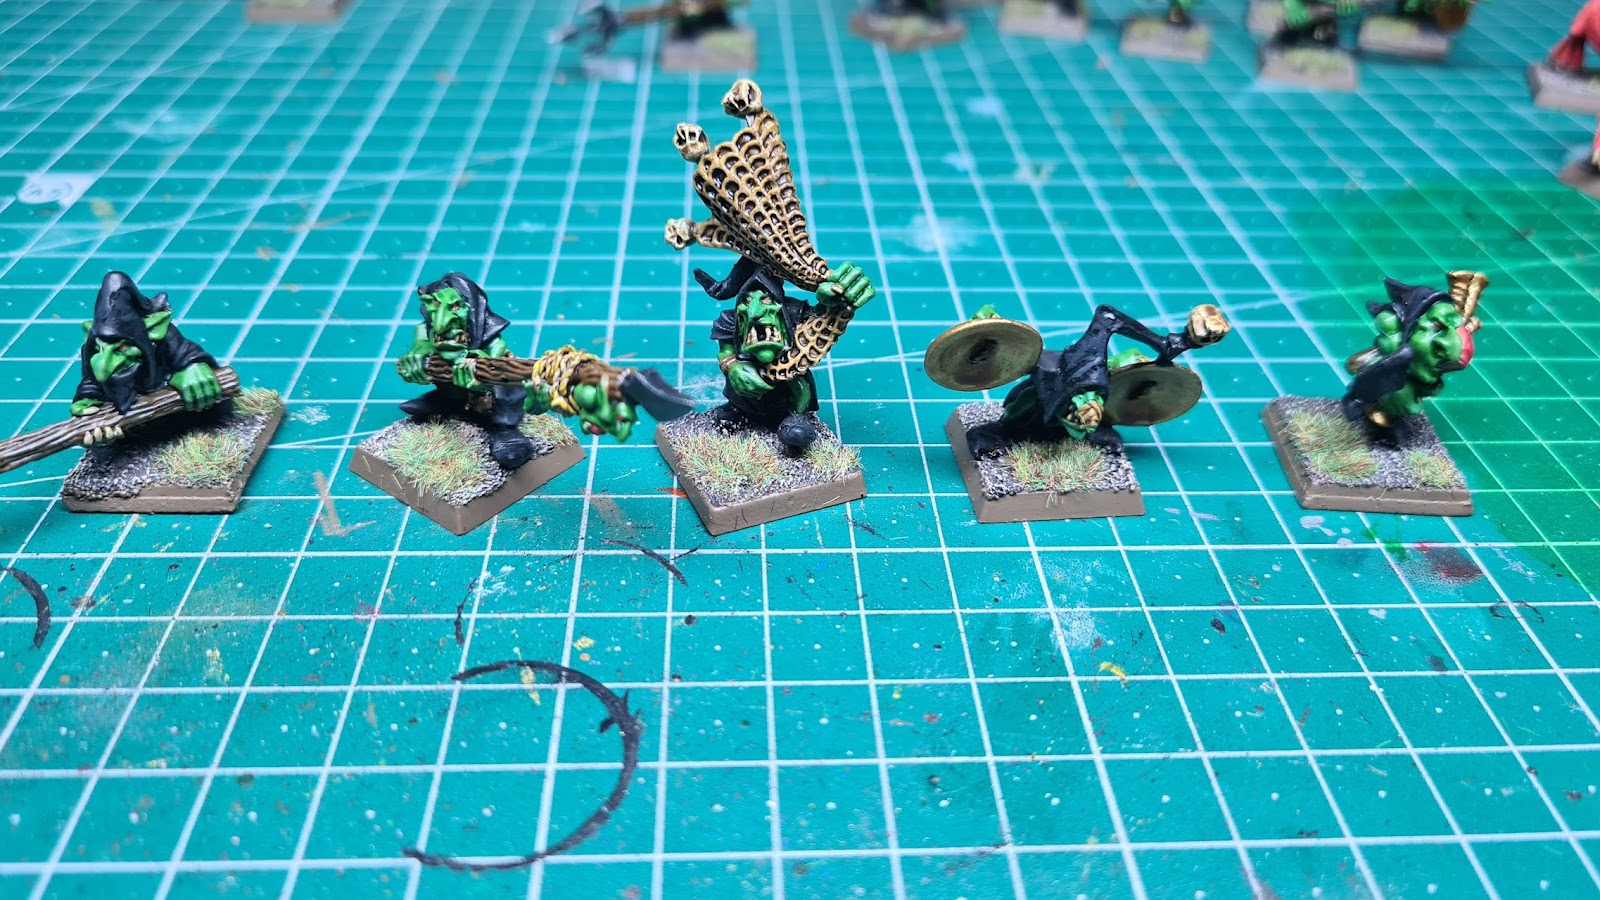
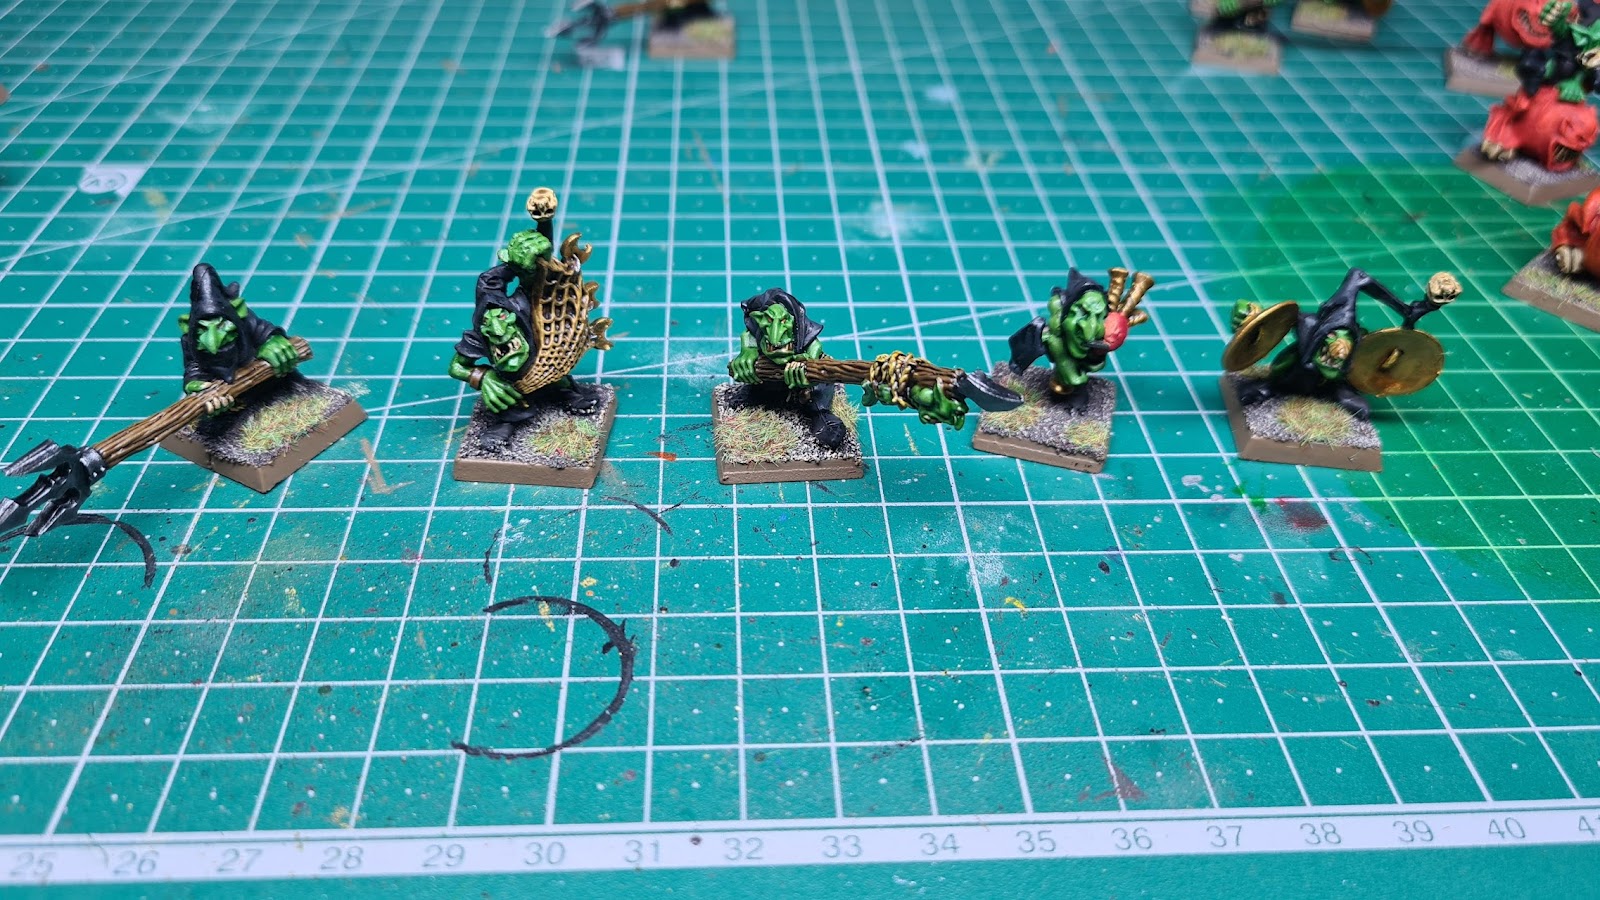
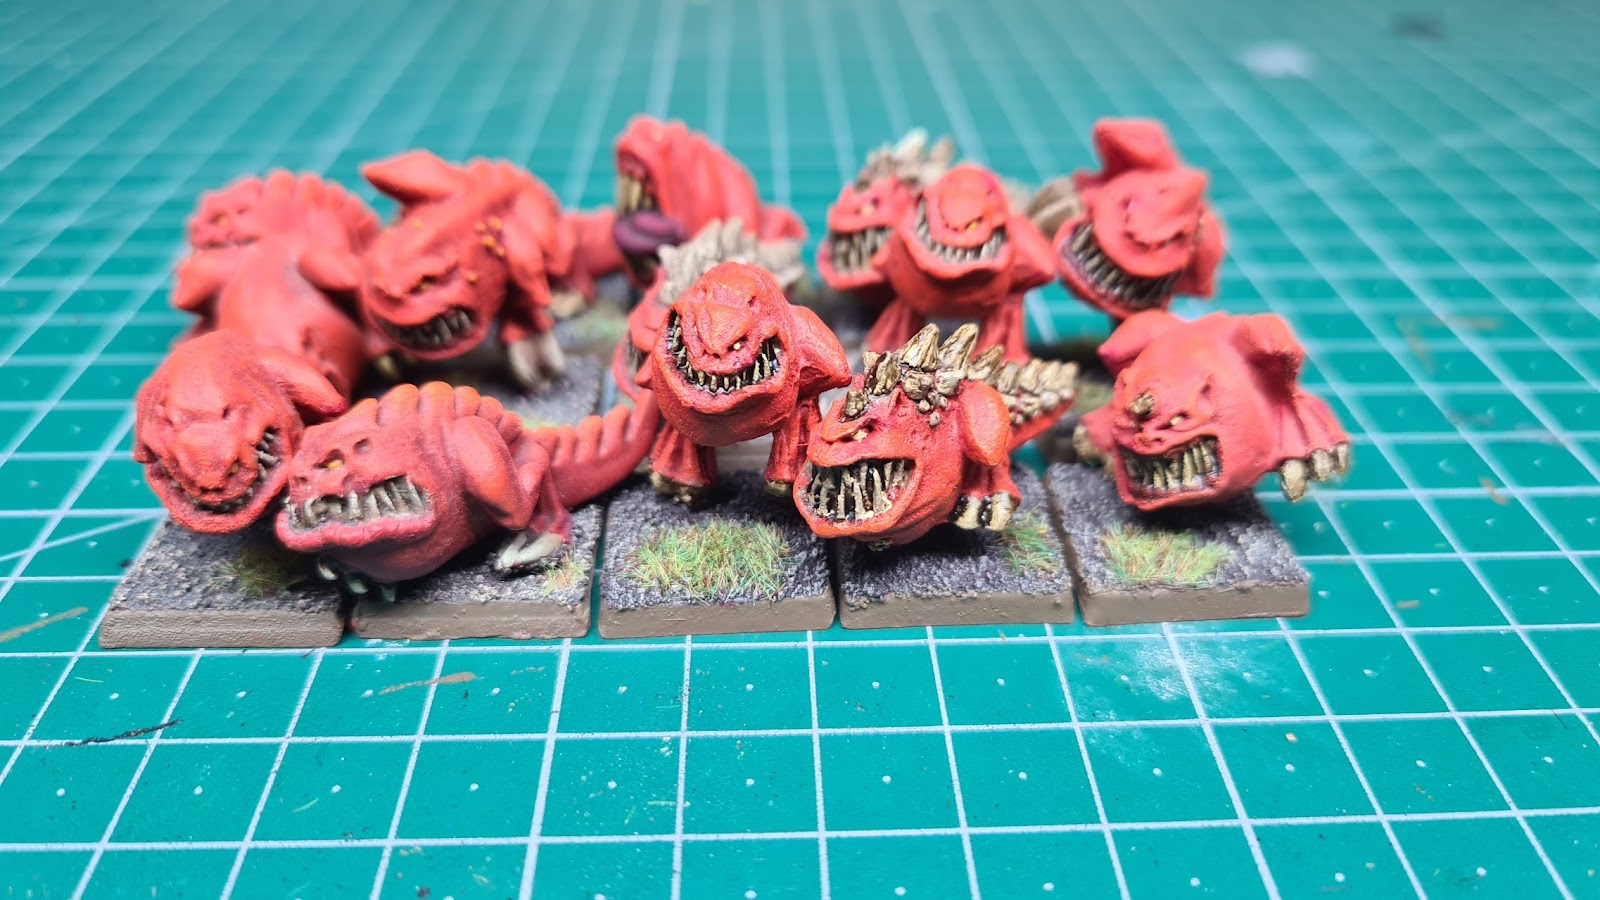
The skin of the Squigs was done a long time ago, and from what I can remember, it was sprayed Army Painter Dragon Red, the dry brushed Army Painter Pure Red and a light dry brush of Army Painter Lava Orange. The Night Goblins were painted as usual, and the Squig claws and teeth were done in the typical method of brown base and Skeleton Bone highlight, but his time I used Citadel Agarax Earthshade wash on it.

Squigs on the loose!

Big mouths and big teeth!

Some squigs are unicorns?

Hoppity hop.

These are all metal and they seem to chip quite easily, the bases are also wonky. As these were bought off eBay a long time ago, the original owner had them on custom magnetic bases, and they really didn't rank up nicely because of these bases. Trimming the bases helped a lot, but they look weird individually, but once ranked up, they look great.

Hungry Hungry Squigy!

Squigs being herded by some hoppers!

That's it for this update! I have more squigs to paint, and they also need some handlers, so expect some more of these guys and their handlers in the future!

Tuesday, 21 November 2023

Happy Birthday Richard!


As the title says, it's Richards birthday today, and in this blog post I'll be showing off his present that I prepared for him. Its a squad of Salamander Aggressors with flamers!


I started this project back in mid October, when a new, more flexible resin arrived for me to try. This resin was a bit more expensive and might have been too flexible for miniatures, so a recommendation was to mix it 1 part to 3 parts with regular resin. The result was excellent, they feel more durable and the print came out without fail.


Gluing the models together was a breeze and after a white undercoat, I tried using contrast paint to block in the armour. It unfortunately didn't come out like I wanted, and as such I started experimenting with some Vallejo greens that I have. I settled on Park Green Flat with a tint of Transparent Green. The result looked more realistic of green power armour, while brightening the green up without going to far into yellow territory.


Next was going to be the blacks, which I was going to use contrast black for it initially, but decided to block in the black sections with German Grey. Anything metallic was painted this colour too before silver goes on, I find silver looks better with a black colour underneath in general.

Before I go to the black and silver though, I decided to save myself some trouble with mistaken brush strokes. I blocked in any of the gold sections of the armour and the rope hanging from his waist. Like with silver, gold also benefits hugely from a brown underneath it, making it easier to apply and look great. After that, I applied the black contrast onto the shoulder pads, backpack and in between the joints.


Once all the silver and gold was applied, I simply washed them Nuln Oil and Agarax Earthshade respectively. The rope was highlighted Ochre Yellow and the fire in the brazier was blocked in the same colour. The gold trimming had a light silver highlight to accentuate the shine on it, and the flamer weapons had a mix of blue and purple contrast applied to show heat discolouration on them.


The fire itself is a mix of yellow, orange and red contrast paint, painted from the bottom up and blending them as well as I could. I find the contrast paint dries quite quickly and doesn't lend itself too well to blending, but I read afterwards that the painting medium that you can buy allows it to last longer before it dries. Will be looking into that next time I try the same technique. The cables themselves are also yellow ochre, with agarax earthshade over the top of it.


The models themselves look quite good and you wouldn't guess that they are 3d prints of freely available files too. They built quite easily, with the backpack, brazier, cabling and head being the only separate parts to put together. I figured the cables would be quite fiddly, but they went on very easily. However, the head doesn't quite fit into that monocoque and if I didn't have this more flexible resin, I fear I might have had a break on it if it was the more fragile resin.


Overall I am quite happy with how they came out, and the paint scheme is quite pleasing to work on. I left the bases untouched so Richard can base them to match his own guys, and the shoulder pads and knees are also bare, so he can apply his decals to them and mark them however he wants them.


That's it today. Happy birthday Richard!

Monday, 13 November 2023

A small update

 Ages ago Greg bought two separate PSC kits for his German forces. These included Halftracks and Tiger tanks. He was not inspired to build them seeing all the parts and options. Being a bro, I figured I could do them for him - at that particular time, he didn't seem to have much in the way of variety for his army - and wanted to help hasten this myself.

I went ahead and built them. Two boxes each of 4 or 5 vehicles. Putting the Tiger tanks together was fine, except I fucked the tracks up big time one in particular. I can't remember why exactly, but warm water helped warping or something and it basically fucked the tracks up. I managed to source a single sprue to replace the one I fucked and finished his kits for him, however, I was now left with a single incomplete Tiger tank in 15mm scale.

Naturally this gave me the idea to convert it to an objective marker, rather than waste it and throw it out. I placed some filler on a base and roughly molded it to how I thought the tank should sit. Originally I thought that perhaps a Typhoon strafed it with its rockets and crippled its tracks on one side - this meant I could use one set of broken tracks and not have it sat on its running wheels - which would look daft. Anyway, I figured the earth raised up beneath it, bogging it, exposing its side to a bigger gun - probably a 17 Pounder - which destroyed the side / running wheels and the other set of tracks. I did this the same way I used on the knocked out Sherman tank a long time back.

I also tried to apply a smoke dry brush to look like it burned out internally, which I don't think is as visible as is on the Sherman due to camouflage and the wash and lacquer spray, but it's fine and it's obvious it is destroyed and does the job. The base was also painted White to show it's an objective.


In my excitement to finish it, I had forgot to add any decals for extra detail, but it's ok. I also purposefully left any grass off the base as I imagined the earth spilling over from the rocket attack buried the grass underneath it. Once it was done, I am considering adding a bit just to give something bright to contrast with the dark tank and mud. But I will see.

Until next time.

Finally! An update has come home!

So I've finally done some hobby work, and so its time to revive the blog. First on the block to show off is some Night Goblins I was wor...