Tuesday, 21 November 2023

Happy Birthday Richard!


As the title says, it's Richards birthday today, and in this blog post I'll be showing off his present that I prepared for him. Its a squad of Salamander Aggressors with flamers!


I started this project back in mid October, when a new, more flexible resin arrived for me to try. This resin was a bit more expensive and might have been too flexible for miniatures, so a recommendation was to mix it 1 part to 3 parts with regular resin. The result was excellent, they feel more durable and the print came out without fail.


Gluing the models together was a breeze and after a white undercoat, I tried using contrast paint to block in the armour. It unfortunately didn't come out like I wanted, and as such I started experimenting with some Vallejo greens that I have. I settled on Park Green Flat with a tint of Transparent Green. The result looked more realistic of green power armour, while brightening the green up without going to far into yellow territory.


Next was going to be the blacks, which I was going to use contrast black for it initially, but decided to block in the black sections with German Grey. Anything metallic was painted this colour too before silver goes on, I find silver looks better with a black colour underneath in general.

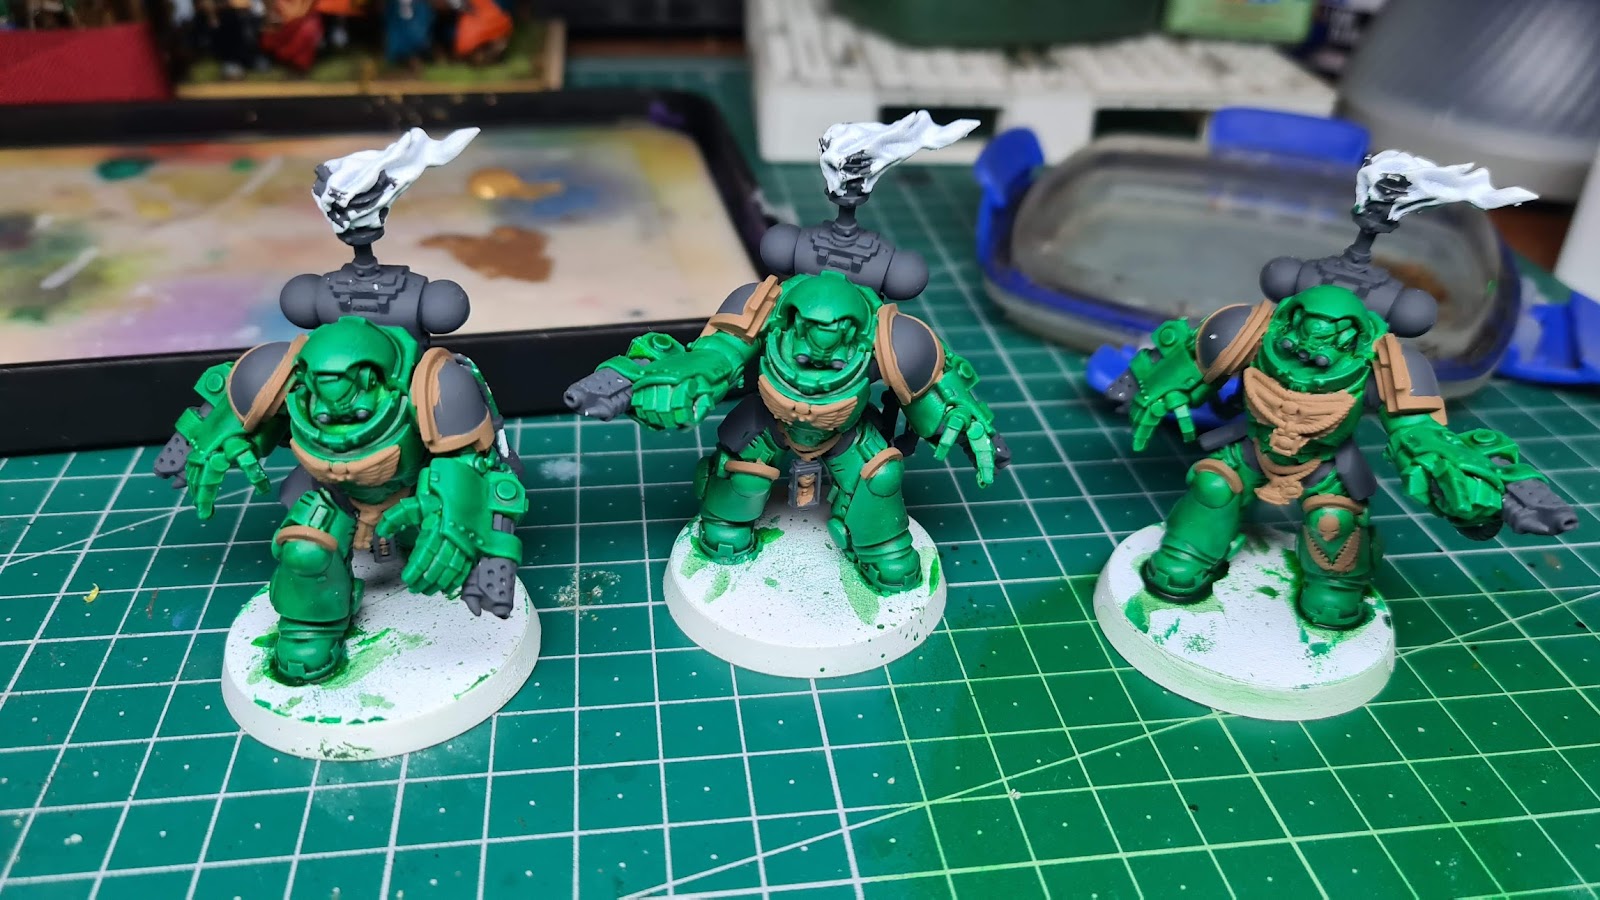
Before I go to the black and silver though, I decided to save myself some trouble with mistaken brush strokes. I blocked in any of the gold sections of the armour and the rope hanging from his waist. Like with silver, gold also benefits hugely from a brown underneath it, making it easier to apply and look great. After that, I applied the black contrast onto the shoulder pads, backpack and in between the joints.


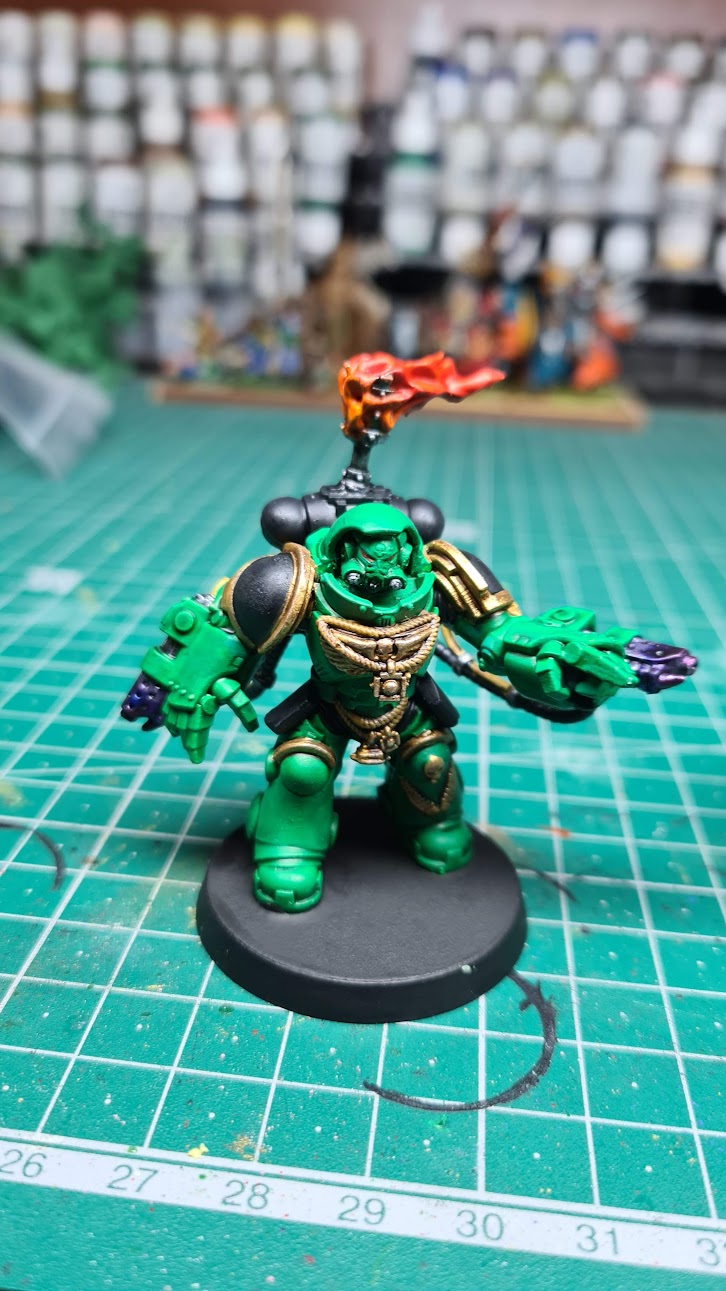
Once all the silver and gold was applied, I simply washed them Nuln Oil and Agarax Earthshade respectively. The rope was highlighted Ochre Yellow and the fire in the brazier was blocked in the same colour. The gold trimming had a light silver highlight to accentuate the shine on it, and the flamer weapons had a mix of blue and purple contrast applied to show heat discolouration on them.


The fire itself is a mix of yellow, orange and red contrast paint, painted from the bottom up and blending them as well as I could. I find the contrast paint dries quite quickly and doesn't lend itself too well to blending, but I read afterwards that the painting medium that you can buy allows it to last longer before it dries. Will be looking into that next time I try the same technique. The cables themselves are also yellow ochre, with agarax earthshade over the top of it.


The models themselves look quite good and you wouldn't guess that they are 3d prints of freely available files too. They built quite easily, with the backpack, brazier, cabling and head being the only separate parts to put together. I figured the cables would be quite fiddly, but they went on very easily. However, the head doesn't quite fit into that monocoque and if I didn't have this more flexible resin, I fear I might have had a break on it if it was the more fragile resin.


Overall I am quite happy with how they came out, and the paint scheme is quite pleasing to work on. I left the bases untouched so Richard can base them to match his own guys, and the shoulder pads and knees are also bare, so he can apply his decals to them and mark them however he wants them.


That's it today. Happy birthday Richard!

Monday, 13 November 2023

A small update

 Ages ago Greg bought two separate PSC kits for his German forces. These included Halftracks and Tiger tanks. He was not inspired to build them seeing all the parts and options. Being a bro, I figured I could do them for him - at that particular time, he didn't seem to have much in the way of variety for his army - and wanted to help hasten this myself.

I went ahead and built them. Two boxes each of 4 or 5 vehicles. Putting the Tiger tanks together was fine, except I fucked the tracks up big time one in particular. I can't remember why exactly, but warm water helped warping or something and it basically fucked the tracks up. I managed to source a single sprue to replace the one I fucked and finished his kits for him, however, I was now left with a single incomplete Tiger tank in 15mm scale.

Naturally this gave me the idea to convert it to an objective marker, rather than waste it and throw it out. I placed some filler on a base and roughly molded it to how I thought the tank should sit. Originally I thought that perhaps a Typhoon strafed it with its rockets and crippled its tracks on one side - this meant I could use one set of broken tracks and not have it sat on its running wheels - which would look daft. Anyway, I figured the earth raised up beneath it, bogging it, exposing its side to a bigger gun - probably a 17 Pounder - which destroyed the side / running wheels and the other set of tracks. I did this the same way I used on the knocked out Sherman tank a long time back.

I also tried to apply a smoke dry brush to look like it burned out internally, which I don't think is as visible as is on the Sherman due to camouflage and the wash and lacquer spray, but it's fine and it's obvious it is destroyed and does the job. The base was also painted White to show it's an objective.


In my excitement to finish it, I had forgot to add any decals for extra detail, but it's ok. I also purposefully left any grass off the base as I imagined the earth spilling over from the rocket attack buried the grass underneath it. Once it was done, I am considering adding a bit just to give something bright to contrast with the dark tank and mud. But I will see.

Until next time.

M-10 3-Inch Gun

 Having had another battle recently, I was again, put in the mood to paint something. This time, I decided on something quick and easy. I we...