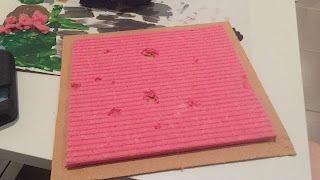
For my third and final ploughed field, I decided to try my hand at a bombed field. Following the same steps as the first two, I glued the sponge to the base and began to cut up bits of the sponge. Using the spak filler, I filled the holes and smoothed them out to look like impact craters. It was a little fiddly to do, and took a few days of touching up and leaving to dry.
Next, I added the base coat of paint. Testing to see how the craters would look, I soon realised I needed to lighten to tone of the entire field, mixing much White to the Burnt Umber. Once it dried, I noticed that some of the filler peeled or broke as the sponge was soft and shifted its form as I painted. It, too, took a few days of adding numerous coats.
Following the same steps as my first field, I began to cut up and glue my fences together. This time, I decided to try something different and make a telephone pole as well. For this, I used a kebab skewer, cut it to size, smoothed it and glued on some 'arms'. Once dried, I hot glued the fences to the base, making sure to make some of them look damaged or destroyed by the Artillery, then began to paint them. Once again, I used a base coat of Burnt Umber followed by a mix of Raw Sienna for a second, lighter coat. Then I added the White and gave them a drybrush to highlight them a bit more. Once I finished that, I added the watered down PVA glue to the base and added the Grass Tufts and the Flock.


No comments:
Post a Comment